We all know agencies often use custom forms to capture information from prospects and current clients (including new quote forms, endorsement forms, and renewal information forms) to help ensure the necessary information is gathered. You could create these as a fillable PDF or Word document, or perhaps some of you are using one of the new online form management platforms. These are all reasonable options.
If you use Microsoft Word for your forms, keep reading.
Microsoft Word can create interactive checkboxes, which are helpful to check off items in a list.
You can find this feature located on the Developer tab, which is hidden by default. Take these steps to enable this functionality and add checkboxes to your documents:
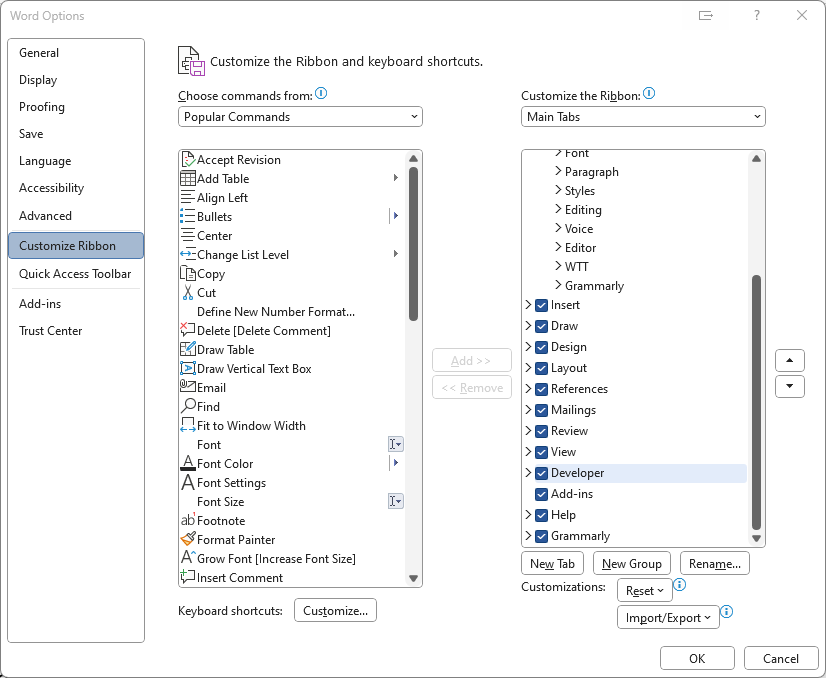
- To show the Developer tab, right-click anywhere in the ribbon and click Customize the Ribbon option in the context menu. In the Options window that appears, check the box next to Developer and then click OK.

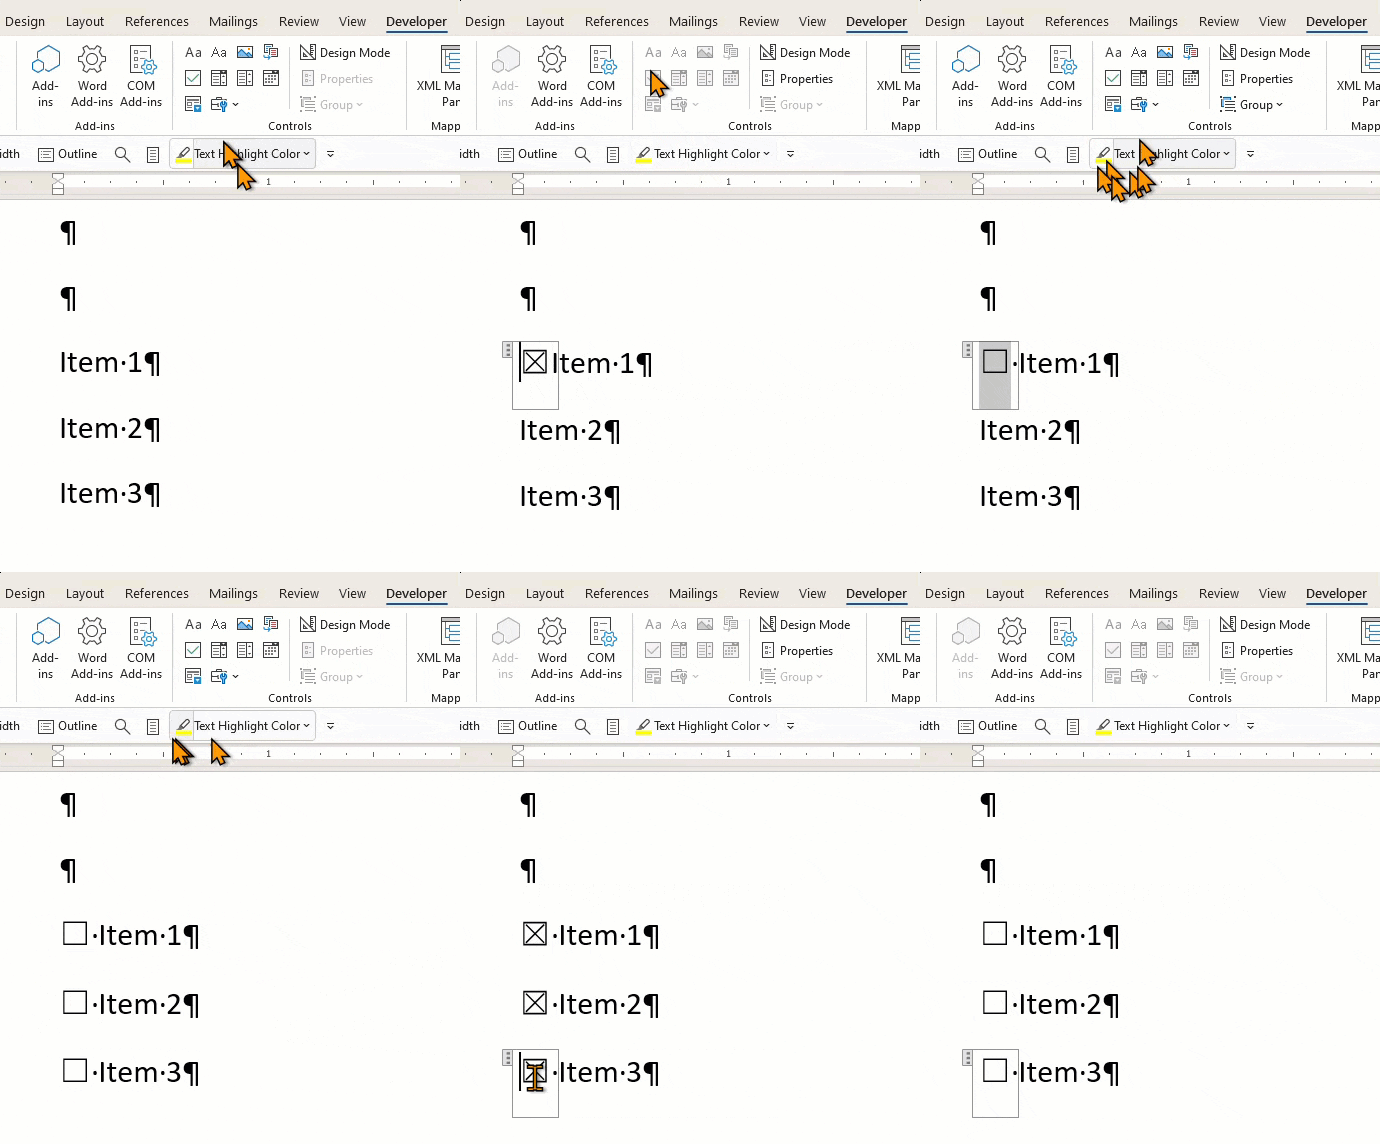
- Now, type out the list you’d like to add checkboxes to.
- Once typed out, place the cursor at the beginning of the first item. Then, in the Developer tab, click the check box icon (i.e. Check Box Content Control) in the Controls group. The check box will appear next to the item. To check or uncheck a check box, just click it with your mouse.


That’s it!
I’ve tried to complete way too many Word forms without this functionality, and this is a simple way to make it easier.


